13. Open Rails Multi-Player
13.1. Goal
The Multi-Player mode implemented in this stage is intended for friends to play OR together, each assuming the role of a train engineer operating a train. There is a built-in way to compose and send text messages, but there is no built-in tool for chatting, thus players are encouraged to use Skype, Teamspeak or other tools to communicate vocally.
Each player must start and run OR on his computer. The network server may be either a special public server so you may not need to set up a network server from your own computer, or the dispatcher computer (see below).
13.2. Getting Started
One player starts as the dispatcher (from a network point of view his computer may be network client or network server, as explained above), and then the others start as standard players. They are always network clients and therefore they are also simply called clients. Each player (dispatcher included) will choose and operate his own consist (and locomotive), but also can jump to watch others’ consists, or couple with others to work as lead and DPU through a tough route, or even act as a dispatching aid to control signals and switches manually.
13.3. Requirements
The dispatcher can start an activity or choose to explore. Clients MUST choose to explore (or a simple activity with timetable but no AI trains).
The client must select the same route played by the dispatcher.
It is not required for everyone to have the same set of paths, rolling stocks and consists.
13.4. Technical Issues
If you start the server at home, it will be necessary for you to learn your public IP address. You may also need to configure your router for port forwarding. Details to accomplish these are given in sections that follow.
It is recommended that you do not run a server for a prolonged period as the code has not been tightened for security. Only tell people you trust that you have a server started.
13.5. Technical Support
You can ask questions in the following forums: trainsim.com, elvastower.com, uktrainsim.com, etc.
A web forum has been set for you to post questions and announce servers. You can also request a private club so that only your friends know of your server. The forum is free to join and post: http://www.tsimserver.com/forums
13.6. Starting a Multi-Player Session
13.6.1. Starting as Dispatcher
To start as Dispatcher you must be the first player to enter the multiplayer session.
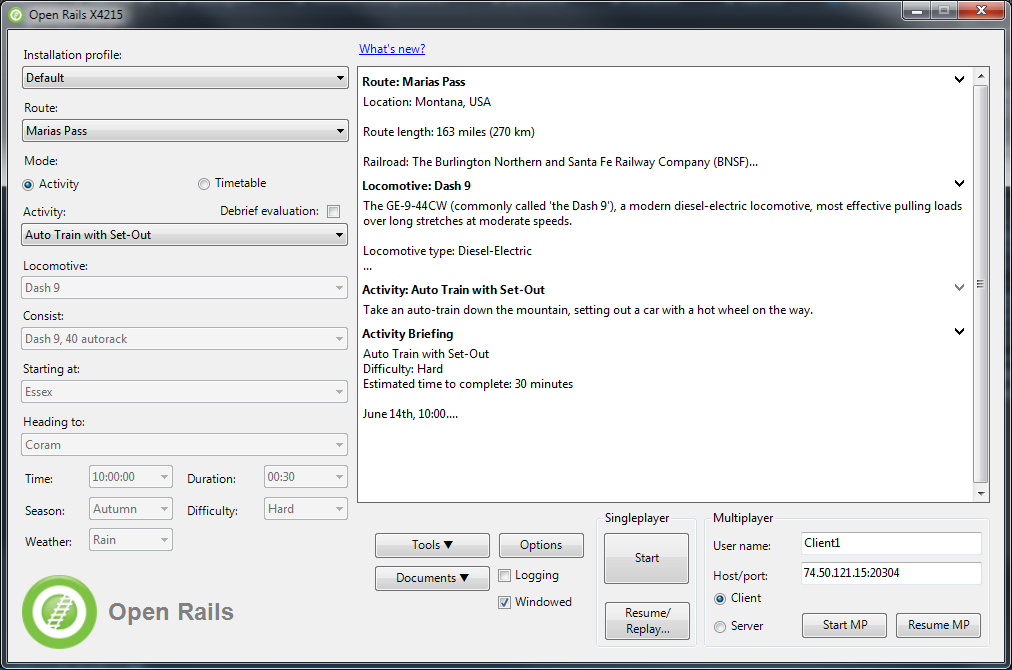
On the OR main menu you select in a standard way as described in the Getting started chapter on the left side Route, activity or explore route, and in case of explore route you select as usual locomotive, consist, path, time, season and weather.
On the lower right side you enter your User Name and the host and port
address. If you want to run as standalone local server, or if you want to have more
than one instance of OR running in MP mode on the same computer, you must set
Host/port to 127.0.0.1:30000. 30000 is the default port, but you can
change to any integer between 10000 and 65536.
If you want to run in a local area network usually valid host addresses are
192.168.1.2 or 192.168.1.1.
If you use the special public server you need to check the Client”* radio button. If instead your computer acts as server, you check the Server”* radio button.
After having inserted the Username and Host/port data you click on Start MP.
Note that when using the special public server ,
After start, Windows Firewall may ask if you want to allow OR access to the Internet. If so, click Allow. If you use other firewall software, you may need to configure it to allow OpenRails to access the Internet.
There is no built-in limit of how many players can connect; a server with good Internet upload bandwidth can be expected to handle at least 10 client connections.
13.6.2. Starting as Client
On the left side of the main menu you must enter only route, path and consist. The other parameters are received from the server.
On the right side you enter your username, IP address and port of the server, you check the Client radio button and the you click on Start MP.
13.7. In-Game Controls
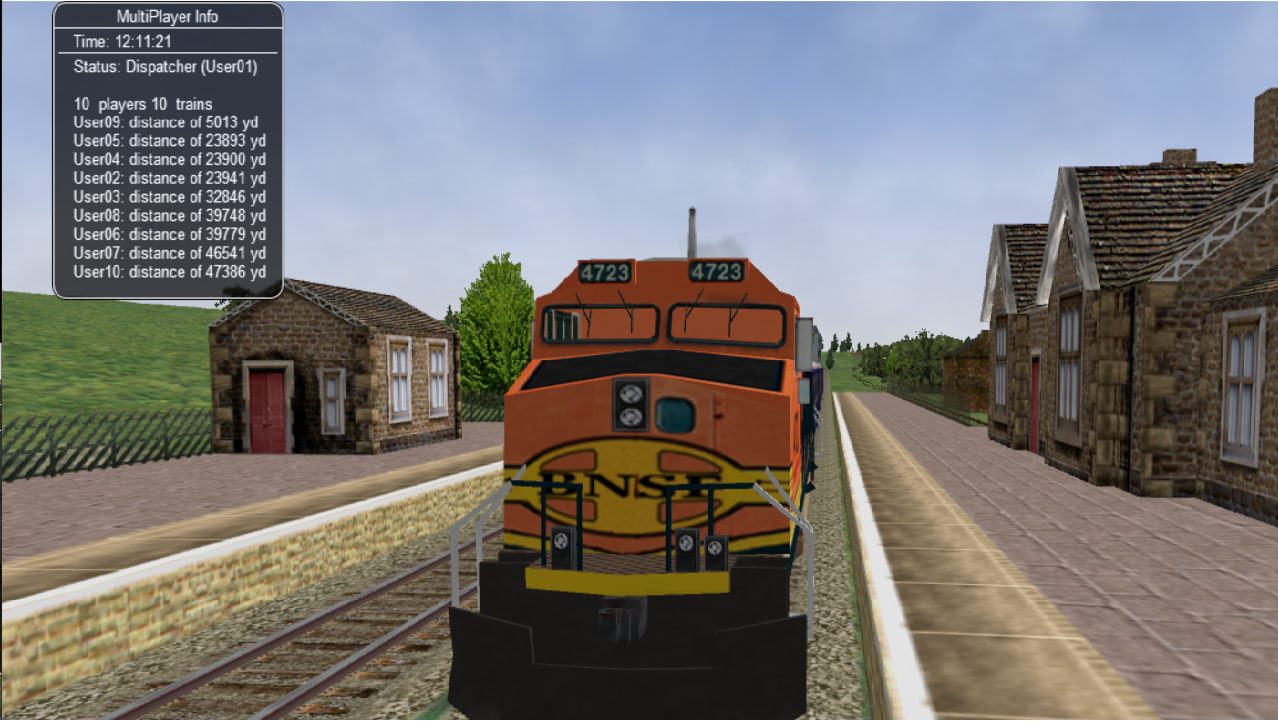
Once the dispatcher and clients have started and connected, to display the
MultiPlayer status, you must press <Shift+9> to display the MultiPlayer Info window,
at the bottom of it you will see the information. You can watch how many players and trains
are present and how far away you are from others. You can also look if you
are acting as dispatcher or as client and the username of each one.
A player joined will have the same weather, time and season as the dispatcher, no matter what are the original choices.
The player train may join the world and find that it is inside another train. Don’t panic, you have two minutes to move your train out before OR thinks you want to couple with that train.
AI trains are added by the dispatcher computer (if it runs in activity mode) and broadcast to all players. As a client, do not start an activity with AI trains; moreover it is recommended that you start in Explore mode on the client.
You can jump to see other trains in sequence by pressing <Alt+9>.
OpenRails will cycle through all active trains with each key
press. If you are running an activity OpenRails will include in the cycle any
static consists that are used in the activity. As some trains may be far away,
OpenRails may need a few seconds to load the surrounding scenery. Thus you
may temporarily see a blank screen. You can press F7 to see train names. You
can press 9 to return to seeing your own train.
Locations of trains from other players are sent over the Internet. Because Internet routings vary moment to moment there may be some lag, and trains may jump a bit as OpenRails tries to update the locations with information received.
You can couple/decouple as usual. As coupling is controlled in the dispatcher
computer, a
player needs to drive slowly so that the dispatcher computer will have accurate
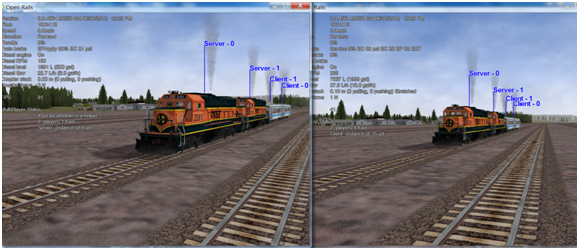
information of train positions. If two player trains couple together, one of
them will become a helper, and a message will be shown on the left indicating
that the player is in Helper mode. A player in Helper mode cannot control
his consist as it falls under control of the lead locomotive. By pressing
<Alt+E> you can swap Helper status with another player on the train.
Always press <\> and <Shift+/> to reset brakes each time after
coupling/uncoupling. Note that two trains can’t couple together before two
minutes are passed from their presence in the Dispatcher’s computer.
Players can uncouple their own trains. Players in the uncoupled trains may
need to press <Alt+E> to gain control; otherwise, the uncoupled
trains may become a loose consist. Always stop completely before uncoupling,
otherwise weird things may happen. Players may also need to press keys for
resetting brake state after uncoupling (see here).
Players can throw switches by pressing <G> or <Shift+G>, and the
switch state will change for all players on the server. The server has a
choice to disallow clients to throw switches manually.
Both switches and signals are synchronized through the server (default every 10 seconds).
Player actions, such as sounding the horn or bell, turning on or off headlights, moving the pantograph up and down, opening and closing doors, moving the mirrors are broadcast to other players. Currently only the player controlled train has the cone of light shown.
A separate Dispatcher Window (also shown below)
showing the route, signals and trains can be activated by pressing Ctrl+9.
By default, it is minimized and you must click on it on the Taskbar to make
it active. You can hide it by pressing <Ctrl+9> again or by pressing
<Esc> when that window has the focus. This window is an extended version
of the Dispatcher Window.
You can zoom in and out by rotating the mouse wheel, or by holding both the left and right mouse button and moving the mouse (if you do not have a mouse wheel). You can hold shift key while clicking the mouse in a place in the map, which will quickly zoom in with that place in focus. You can hold Ctrl while clicking the mouse in a place in the map, which will zoom out to show the whole route. Holding Alt and clicking will zoom out to show part of the route.
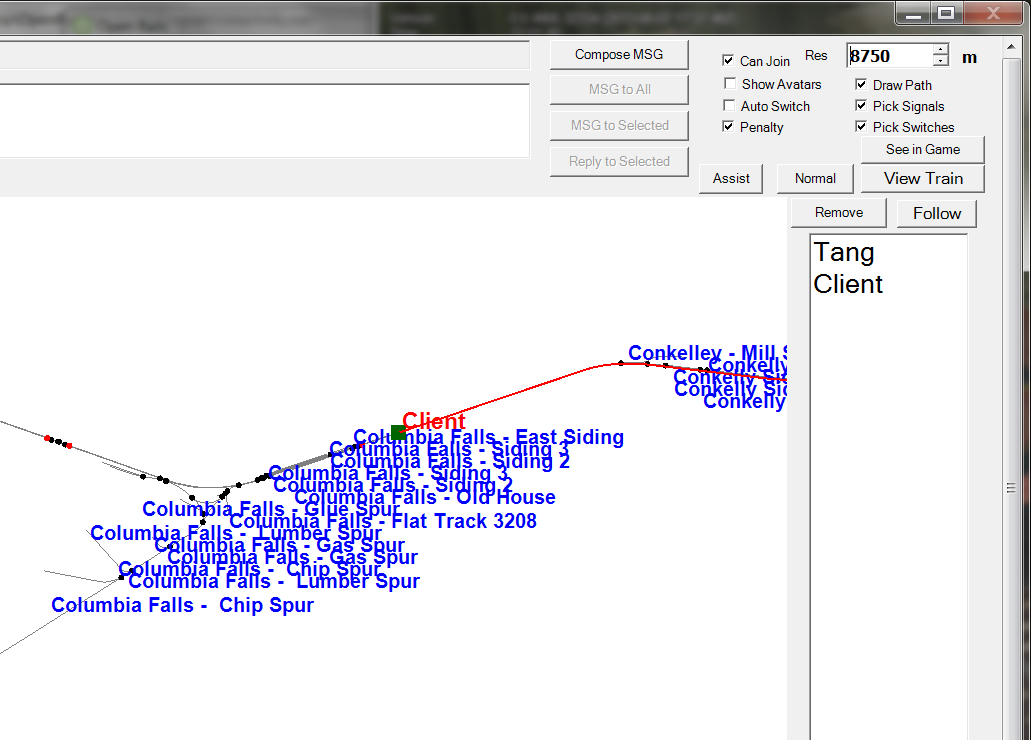
A red line will be drawn for each train so you can find its intended path.
You can select a train either by clicking on the name in the right bar, or in the map by clicking the green train body. After that, you can click the Remove button to delete that train from the game.
You can pan the window by dragging it with the left mouse button.
One can click a switch (or signal) and press <Ctrl+Alt+G> to jump to
that switch with the free-roam camera.
The Dispatcher player can click a switch (black dot) and choose Main Route or Side Route to switch. He can also click on a signal (green, red or orange dot) and choose to change the signal status.
The Dispatcher can choose a player and give the player right to throw switches and change signals, by clicking the button Assist. The right can be revoked by click the Normal button.
The Dispatcher can choose a player from the avatar list and remove that player from the game.
You can send a text message by typing in the top left text input area, and view the most recent 10 messages from the viewing area. You can send message to all after finishing it, or select some avatars and send a message to those selected.
13.8. Summary of Multi-Player Procedures
Dispatcher can start an activity or Explore. Clients must choose to Explore the route or start with an activity without AI trains.
Missing rolling stock in other players’ consists will be automatically replaced by existing cars from local directory. This can lead to awkward consists.
You have two minutes after joining the game to move your train out of other trains.
Use
<Alt+9>to see other trains, 9 to see your own train,<Ctrl+9>to view/hide the dispatcher window. Use the mouse wheel to zoom and left mouse button to pan the dispatcher window.You can send and read messages from the dispatcher window
Use
<Ctrl+Alt+F11>to see the path trains will follow, and<F7>to see train namesMove trains slowly when trying to couple. Trains don’t couple in their first two minutes of life.
Use
<\>and<Shift+/>(on English keyboards) just after your train is coupled or uncoupled, or when you just gain back the control of your own train.Use
<Alt+E>to gain control of your own train after uncoupling.Use other communication tools (such as Ventrillo or Skype) to communicate with other players.
Always completely stop before uncoupling trains with two players coupled together
13.9. Possible Problems
A server may not be able to listen on the port specified. Restart the dispatcher and the clients and choose another port.
If you cannot connect to the server, verify you have the correct IP address and port number, and that the server has the port opened.
If other players have rolling stock you do not have, that train will automatically replace cars from your own folder, and this replacement may make the consist ‘interesting’.
You may join the game and see you’ve selected the same start point as someone else and that your train is inside another train. Move the trains apart within two minutes and it will be fine.
If your train is moving too quickly when trying to couple, the process may not work and weird things can happen.
As the dispatcher has absolute control, clients may notice the switch just changed will be changed back a few seconds later if the dispatcher controlled train wants to pass it.
Coupling/uncoupling the same set of trains may end up with weird things.
<Ctrl+E>locomotive switch may have train cars flipped.When the server connection is lost, a message appears in the MultiPlayer Info window:

13.10. Using the Public Server
A special public server is deployed so that you do not need to use your own computer as the server, avoiding the setup problems you may encounter. You can find the IP and port numbers here.
To connect to this public server you must act as described here, using IP and port numbers as found on the above link, with only a difference: the first player entering the session has to enter by clicking on Client and not on Server, even if he intends to be the dispatcher. If the port has no player yet, whoever connects first will be declared the dispatcher, others connected later will be normal players.
The public server runs a special code that is not part of OR. If you plan to run such a server for free, please contact the email listed in http://tsimserver.com/forums/showthread.php?2560.
13.10.1. Additional info on using the Public Server
If the computer of the player acting as dispatcher crashes or if the connection with it breaks down, the public server will try to appoint another player as dispatcher. Such player will receive on his monitor the following message: You are the new dispatcher. Enjoy!
If a client crashes or loses the connection, its position is held by the server for 10 minutes. If the client re-enters the game within such time frame, it will re-enter the game in the position where he was at the moment of the crash.
13.11. Standalone multiplayer server
If preferred, a standalone multiplayer server may be run on a local computer. It must be started before the players enter the game. To start it, click on the Tools button in the main menu window, and then select MultiPlayer Server. A window as shown below will appear.

First only the three first lines will be shown. As soon as the first player enters the game (he must select the URL and the port of the standalone multiplayer server; furthermore he must select the Client button, enter a User Name and click on Start MP) , he becomes appointed as the dispatcher, and the standalone multiplayer server starts displaying all messages sent and received. At this point all other players can enter the game.
13.12. Save and resume
Networked games may be prone to crashes, and it is not nice if you get a crash in the middle of a long-lasting game and you have to restart the game from its beginning.
Therefore also for multiplayer mode the Save and resume feature is available: it is advisable that the dispatcher regularly saves the session by pressing F2 during game.
If a crash occurs, the procedure to resume game is described here below. When the dispatcher wants to resume the session from the last save, all players must be off the game.
The dispatcher must have in his main menu path and consist as in the saved session. He clicks the Resume MP button and in the resume window he selects the session he wants and clicks on the Resume bùtton therein. When he is again in the game, he will see in the dispatcher window that the other player trains are shown in grey on the route. Now the other players have 10 minutes to re-enter the game where they were when the game was saved. They too must have in their main menu their original path and the consist they had in the moment the game was saved. They must select Start MP to re-enter the game. They will re-enter the game in the place where they were and with the consist they had when the game was saved. If however the train proceeded less than 1 Km from game start, the player will re-enter the game at the beginning of the path with his original consist.
As there are many possible cases, it may be possible that some of them are not covered.
13.13. Setting up a Server from Your Own Computer
As any online game, you need to do some extra work if you want to host a multiplayer session.
13.13.1. IP Address
If you are running at home and use a router, you may not have a permanent IP. Thus before you start as a server, you must find your IP. The quickest ways are the following:
Using Google: type in
find ip address, then Google will tell you
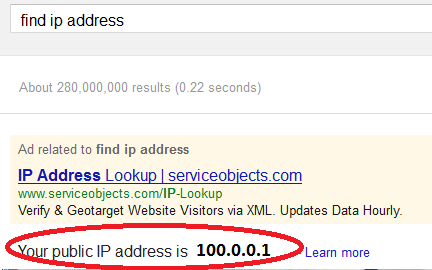
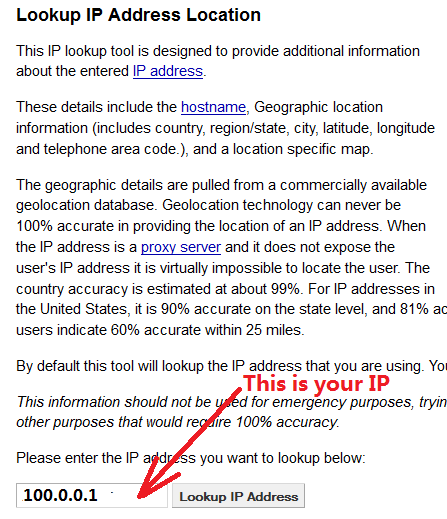
If the above does not work, try http://whatismyipaddress.com/ip-lookup/, which shows your IP in the middle of the page.
13.13.2. Port Forwarding
If you are using a router at home with several computers, your router needs to be told which computer on your home network should receive the network data OpenRails needs. This is done by enabling Port Forwarding on the router. The default port OpenRails uses is 30,000. If you change that port number in the game you’ll need to change the forwarded port number in the router as well. Your router must be told to forward data arriving from the internet on the correct port to the network IP address of the computer running OpenRails. For more information on Network Address Translation (NAT) and how Port Forwarding works, see this site: http://www.4remotesupport.com/4content/remote_support_NAT.html Here the following are the steps:
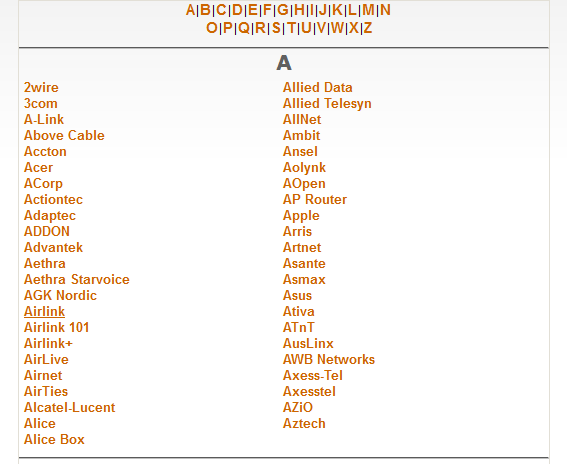
Go to http://portforward.com/english/routers/port_forwarding/, which contains a lot of ads - just focus on the center of this page.
Locate the name of the manufacturer of your router, i.e. Airlink and click it:
A page may appear allowing you to select your specific model of router:
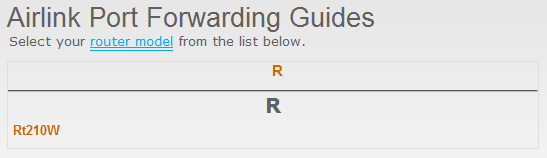
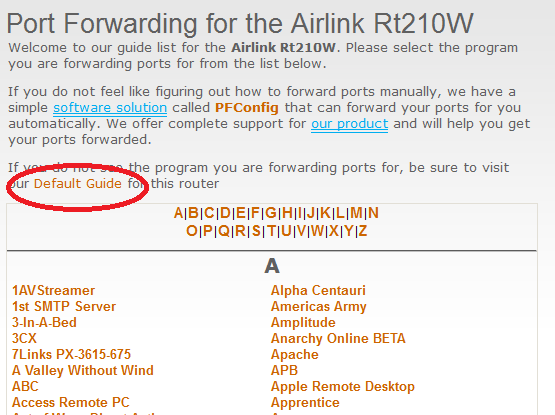
It then shows all the programs (games) for which you want to forward ports. Just click ‘Default Guide’:
A page like the following should appear. Ignore the part crossed-out but pay special attention to the part enclosed in red:
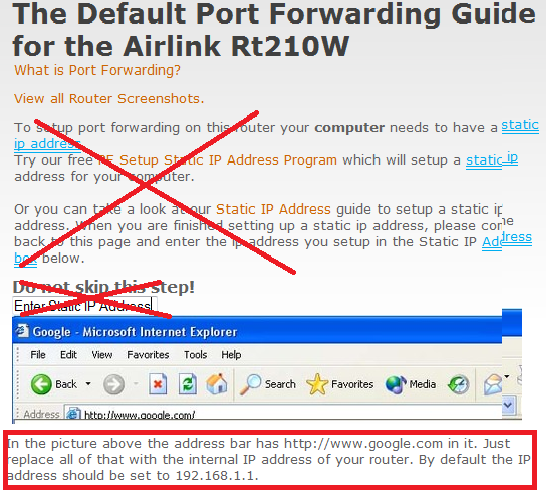
Then follow the steps listed on the screen. Remember you want to forward port 30000 by default, but if you change that you’ll have to forward the correct port.
If you still cannot get others connected to your computer, please go to http://www.tsimserver.com/forums and ask questions.