6. Open Rails Options
Clicking on the Options button opens a multi-panel window. The Menu > Options panels contain the settings which remain in effect during your simulation. Most of the options are self-explanatory; you may set them according to your preference and system configuration. For example, you can turn off dynamic shadowing if your system has low FPS (frames-per-second) capability. The options configuration that you select is saved when you click OK. When you restart OR, it will use the last options configuration that you selected.
There are 10 option panels, described below.
6.1. General Options
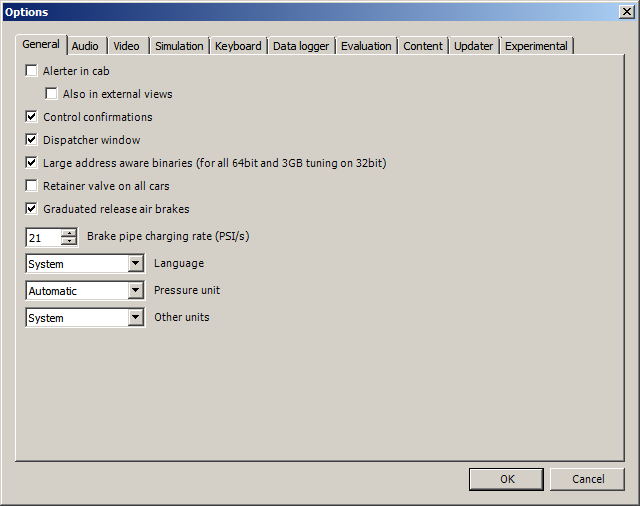
6.1.1. Alerter in Cab
As in real life, when this option is selected, the player driving the train
is required to perform specific actions to demonstrate that he is alive,
i.e. press the Alerter Button (or press the Key <Z>). As the player may
sometimes use a view other than the cabview to follow the train, and
therefore will not see the alerter warning, selecting the related option
Also in external views enables the alerter in those views as well.
6.1.2. Dispatcher window
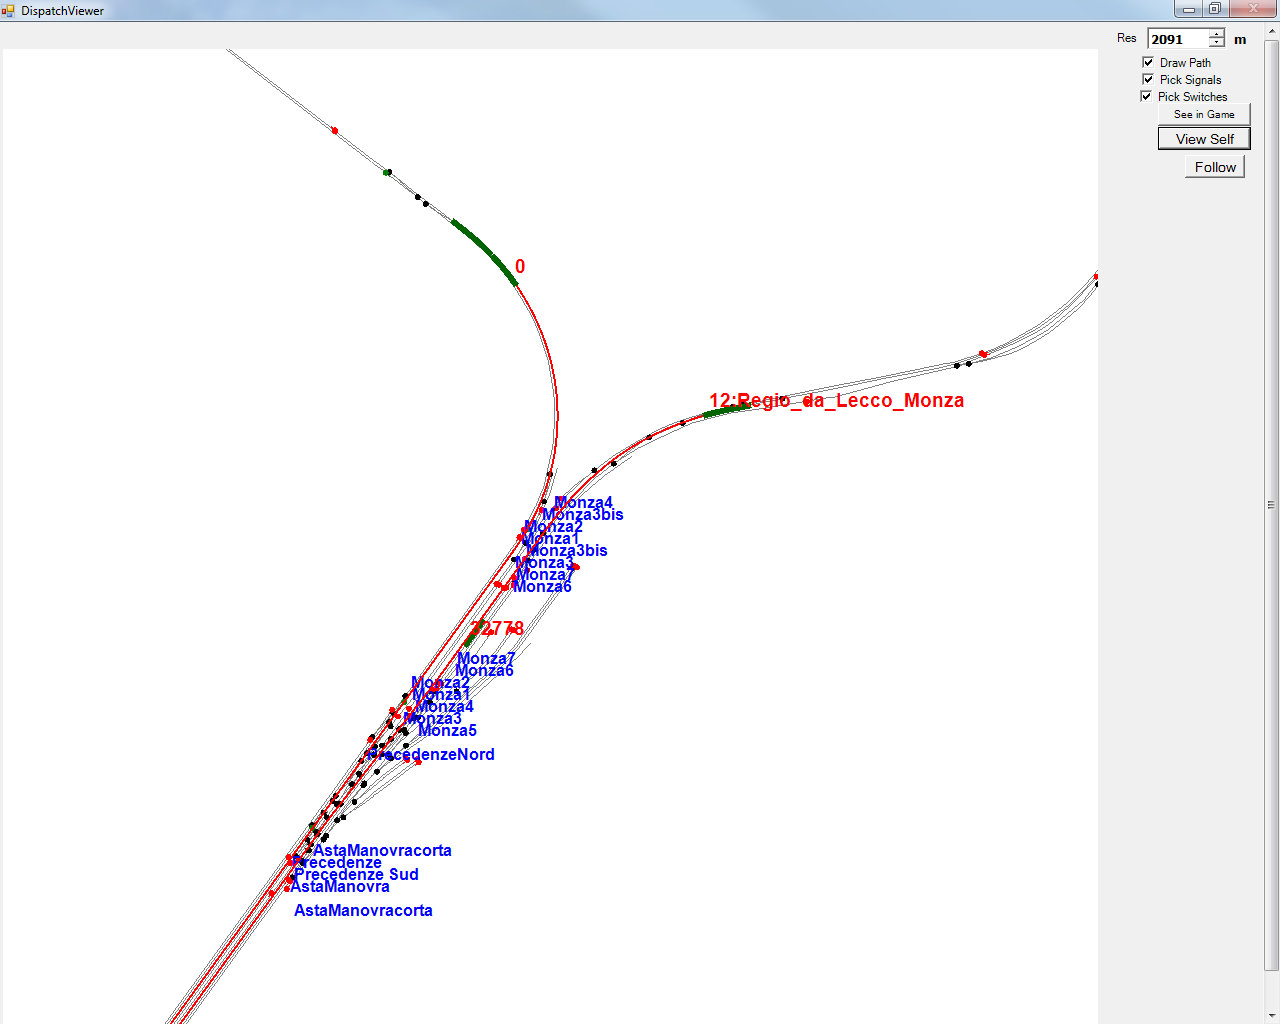
It is suggested to always select this option. When this option is selected,
pressing <Ctrl+9> at runtime creates an additional window like the
following. This window coexists with the main Open Rails window, and
<Alt+Tab> switches between it and the Open Rails window. See the related
option Fast fullscreen Alt+Tab.
Through this window you can monitor train movements and also influence them, by setting signals and switches. A complete description of the dispatcher window can be found here.
6.1.3. Graduated release air brakes
Selecting this option allows a partial release of the brakes. Generally speaking, operating with the option checked is equivalent to passenger standard and unchecked is equivalent to freight standard. A complete description of this option can be found here.
6.1.4. Large address aware binaries
It is suggested to leave this option checked. When it is unchecked, Open Rails can use a maximum of 2 GB of RAM. When it is checked, the maximum is 4 GB for 64-bit Windows systems, and 2 or 3 GB for 32-bit Windows systems. To increase the maximum RAM used by OR in 32-bit Windows systems from 2 to 3 GB see the information found here.
Take note that the RAM increase from 2 to 3 GB in 32-bit systems can slow down computer operation when not using OR.
6.1.5. Control confirmations
Following MSTS practice, whenever you make adjustments to the train controls (e.g. open the throttle) OR briefly shows a message near the bottom of the screen.
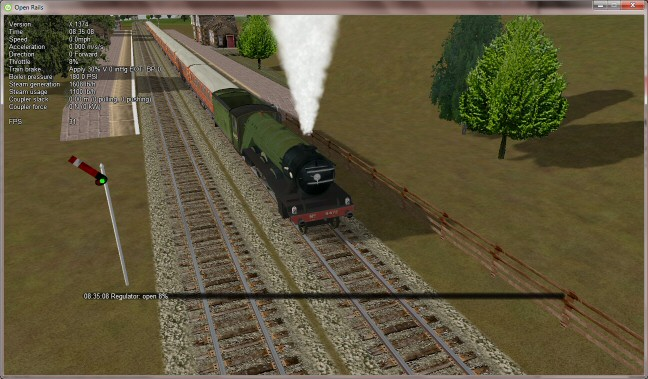
This is helpful for operations that don’t have visible feedback and also allows you to control the train without being in the cab.
Uncheck this option if you prefer to monitor your cab instruments and don’t want to see these messages.
OR uses the same message scheme for system messages such as “Game saved” or “Replay ended” but you cannot suppress these system messages.
6.1.6. Retainer valve on all cars
The player can change the braking capability of all of the cars in the simulation to include Brake Retainers. These cause the brake cylinder on a car to retain some fixed pressure when the train brakes are released; this causes the car to produce a constant braking force. If this option is not checked, then brake retainers are only found on cars that have an appropriate entry, as described here, in their .wag files.
6.1.7. Brake pipe charging rate
The Brake Pipe Charging Rate (psi/s) value controls the charging rate of the main air brake pipe. Increasing the value will reduce the time required to recharge the train (i.e. when releasing the brakes after a brake application), while decreasing the value will slow the charging rate. See also the paragraphs on the OR implementation of the braking system.
If this parameter is set at 1000, a simplified, MSTS-like braking model is implemented, providing for faster brake release and being less influenced by incoherent braking parameters within .eng file.
6.1.8. Language
OR is an internationalized package. It supports many languages, and others
can be added by following the instructions contained in the Localization
Manual which can be found in the Open Rails Source/Trunk/Documentation
folder.
When System is selected, OR automatically selects the language of the hosting OS, if the language is available.
6.1.9. Pressure unit
The player can select the unit of measure of brake pressure in the HUD display.
When set to automatic the unit of measure is the same as that used in the cabview of the locomotive.
6.1.10. Other units
This selects the units displayed for length, mass, pressure, etc. in the F5 HUD of the simulation.
The option Player’s Location sets the units according to the Windows Language and Region settings on the player’s computer.
The option Route sets the units based on the data in the route files. The other options are self-explanatory.
The F5 HUD uses the abbreviations stn for short tons (2000 lb) and t or tn for metric tons (tonnes).
Note that the units displayed by the F4 Track Monitor (e.g. velocity and distance) are always based on data read from the route files.
6.1.11. Disable TCS scripts
This option disables the train control system scripts for locomotives where these have been implemented.
6.2. Audio Options
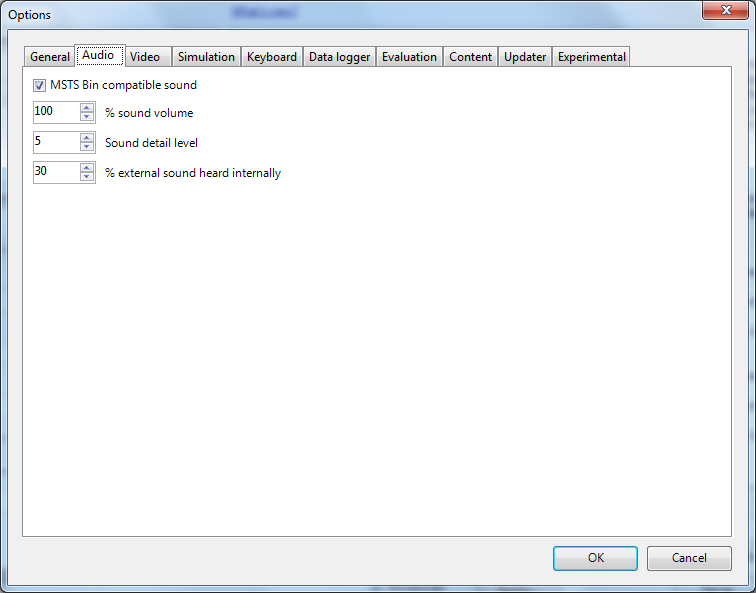
Except for very slow computers, it is suggested that you leave the MSTS Bin compatible sound option checked and set the Sound detail level to 5.
The % sound volume scroll button allows adjustment of the volume of OR sound. Default is 40.
The % external sound heard internally scroll button allows to define the percentage of the original volume of external sounds heard in cab and passenger views. In fact in real world external sounds are attenuated when heard within a trainset. This percentage may be overridden trainset by trainset as defined here.
6.3. Video Options
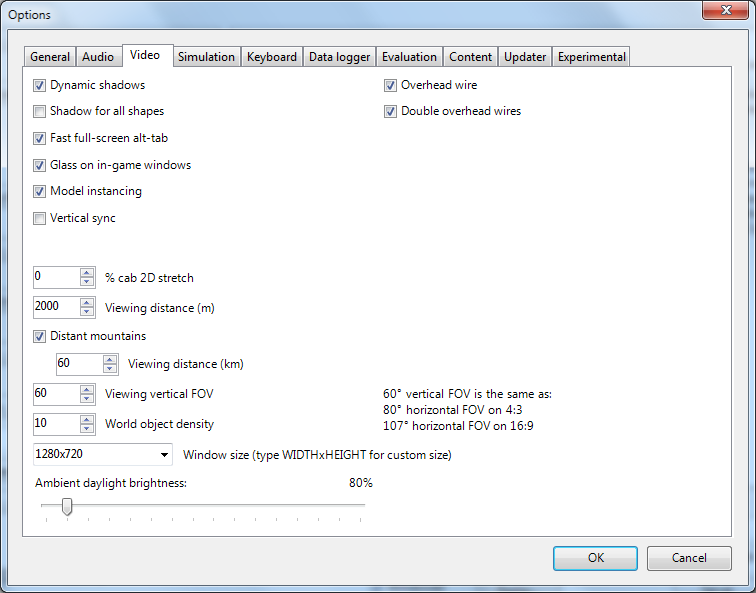
6.3.1. Dynamic shadows
With this option it is possible to enable or disable the display of dynamic shadows. Disabling can be helpful if low frame rates are experienced.
6.3.2. Shadow for all shapes
When this option is selected and also the Dynamic shadows option is selected, OR displays a shadow also for the objects that don’t have a shadow defined in the .ref file, and also for forest trees. This may reduce game performance.
6.3.3. Fast full-screen Alt+Tab
When this option is selected, and OR is running full-screen, pressing Alt+Tab leaves OR full-screen and running, and allows the Dispatcher Window to be shown in front of it. If this option is not selected, OR is minimized. The Dispatcher Window option must also be selected and the Dispatcher Window started with Ctrl+9 to display the Dispatcher Window. Each successive press of Alt+Tab will toggle between the Dispatcher window and the OR window.
6.3.4. Glass on in-game windows
When this option is checked, the in-game windows are displayed in a semitransparent mode.
6.3.5. Model instancing
When the option is checked, in cases where multiple instances of the same object have to be drawn, only a single draw call is sent to the GPU. This means lower CPU load. It is suggested to always check this option.
6.3.6. Overhead wire
This option will enable or disable display of the overhead wire.
6.3.7. Double overhead wires
MSTS uses a single wire for electrified routes; you may check this box so that OR will show the two overhead wires that are more common.
6.3.8. Vertical sync
When this option is selected, the OR update rate cannot be higher than the monitor vertical sync frequency (typically 60 Hz). This reduces CPU energy consumption in fast PCs.
6.3.9. % Cab 2D Stretch
OR manages not only cab interiors using 2D images in a MSTS-compatible way, but also supports 3D models. Most 2D cab images follow MSTS practice, being 1024 x 768 pixels to suit monitors with a 4:3 aspect ratio.
So, the problem arises – how to display these 4:3 cabs on a 16:9 or 16:10 monitor?
One possibility is to stretch these images horizontally to match other aspect ratios, as shown in the image below.
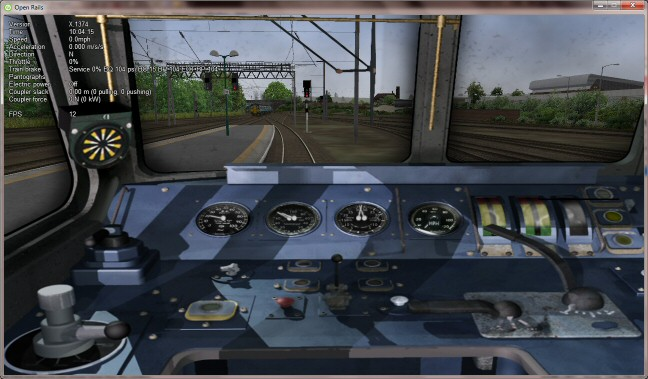
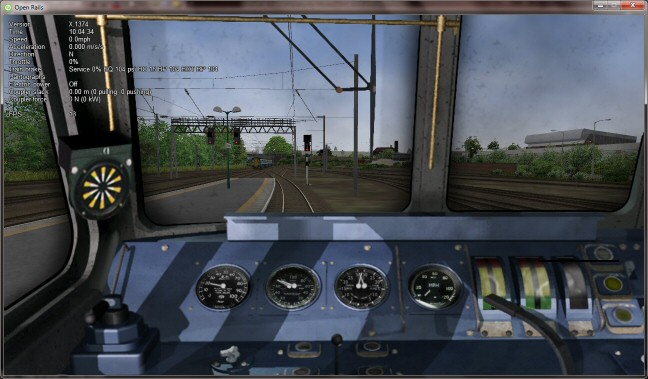
To respect the proportions however, by default OR does no stretching and shows the full width of the cab interior, thus losing a portion from the top and bottom of the image. You can use the Up and Down Arrow keys to pan and reveal these missing portions.
Therefore the setting for % Cab 2D Stretch has a default value of 0 providing no stretching and a maximum value of 100 which stretches the picture so as to cover the complete display. Intermediate values provide a blend of panning and stretching.
6.3.10. Viewing distance
This option defines the maximum distance at which terrain is displayed. At higher distances Distant Mountains will be displayed (see below). This parameter increases CPU and GPU load. Also, some routes are optimized for the standard MSTS maximum viewing distance (2000m).
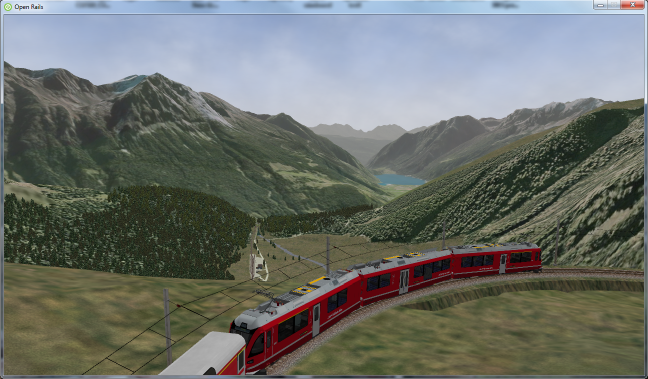
6.3.11. Distant Mountains
Distant mountains are supported in a way that is compatible with MSTS. Distant mountains are present in the route if it has a folder called LO_TILE. You may turn the feature on by checking the Distant Mountains checkbox. In addition to MSTS capability, you can select the viewing distance of the distant mountains.
6.3.12. Viewing vertical FOV
This value defines the vertical angle of the world that is shown. Higher values correspond roughly to a zoom out effect. The default is 45 degrees.
6.3.13. World object density
This value can be set from 0 to 10; when 10 is selected, all objects defined in the route files are displayed. Lower values do not display some categories of objects.
6.3.14. Window size
This pair of values defines the size of the OR window. There are some preconfigured pairs of values, however you may also manually enter a different size to be used.
6.3.15. Ambient daylight brightness
With this slider you can set the daylight brightness.
6.4. Simulation Options
The majority of these options define train physics behavior.
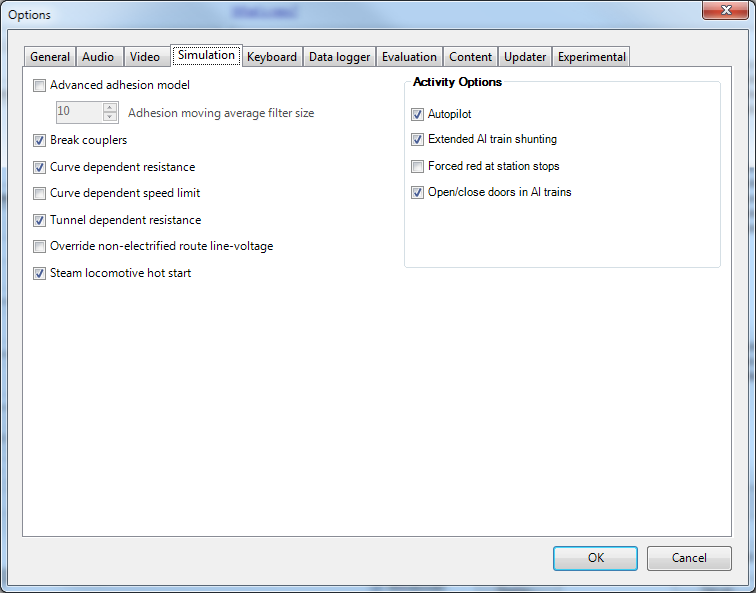
6.4.1. Advanced adhesion model
OR supports two adhesion models: the basic one is similar to the one used by MSTS, while the advanced one is based on a model more similar to reality.
For more information read the section on Adhesion Models later in this manual.
6.4.2. Adhesion moving average filter size
The computations related to adhesion are passed through a moving average filter. Higher values cause smoother operation, but also less responsiveness. 10 is the default filter size.
6.4.3. Break couplers
When this option is selected, if the force on a coupler is higher than the threshold set in the .eng file, the coupler breaks and the train is divided into two parts. OR will display a message to report this.
6.4.4. Curve dependent resistance
When this option is selected, resistance to train motion is influenced by the radius of the curve on which the train is running. This option is described in detail here (theory) and also here (OR application).
6.4.5. Curve dependent speed limit
When this option is selected, OR computes whether the train is running too fast on curves, and if so, a warning message is logged and displayed on the monitor. Excessive speed may lead to overturn of cars, this is also displayed as a message. This option is described in detail here (theory) and also here (OR application). OR does not display the damage.
6.4.6. Tunnel dependent resistance
When this option is selected, OR takes into account the fact that trains in tunnels are subject to higher air resistance, and therefore need a higher effort at invariant speed. This option is described in detail here (theory) and here (OR application).
6.4.7. Wind dependent resistance
When this option is selected, resistance to train motion is influenced by the wind speed, and the direction that it is blowing. This option is described in detail here
6.4.8. Override non-electrified route line-voltage
This option allows running (in a non-prototypical way) electric locomotives on non-electrified routes.
6.4.9. Steam locomotive hot start
This option allows starting the game with the boiler water temperature already at a value that allows running the locomotive. If the option is not selected, you will have to wait until the water temperature reaches a high enough value.
6.4.10. Autopilot
With this option enabled and when in activity mode, it is possible to stay in the cab of the player train, but to let Open Rails move the train, respecting path, signals, speeds and station stops.
It is possible to switch the player train between autopilot mode and player driven mode at run time. The Autopilot mode is described here.
6.4.11. Extended AI train shunting
When this option is selected, further AI train shunting functions are available. This allows for more interesting and varied activities. If an activity is run which makes use of these function, this option must be selected. This option has no effect in Timetable mode.
The following additional shunting functions are available:
- AI train couples to static consist and restarts with it.
- AI train couples to player or AI train and becomes part of it; coupled AI train continues on its path.
- AI train couples to player or AI train and leaves to it its cars; coupled and coupling train continue on their path.
- AI train couples to player or AI train and steals its cars; coupled and coupling train continue on their path.
- AI train uncouples any number of its cars; the uncoupled part becomes a static consist. With the same function it is possible to couple any number of cars from a static consist.
For content developers
A more detailed description of this feature can be found under Extended AI Train Shunting under Open Rails Train Operation.
For content developers
Selecting this option also enables the waiting points to declare an absolute time-of-day instead of a waiting point duration. A more detailed description of this feature can be found in the related paragraph in the chapter Open Rails Train Operation.
6.4.12. Forced red at station stops
In case a signal is present beyond a station platform and in the same track section (no switches in between), OR will set the signal to red until the train has stopped and then hold it as red from that time up to two minutes before starting time. This is useful in organizing train meets and takeovers, however it does not always correspond to reality nor to MSTS operation. So with this option the player can decide which behavior the start signal will have. This option is checked by default. Unchecking the option has an effect on simulation behavior only if no Timetable mode operation is under way.
6.4.13. Open/close doors on AI trains
This option enables door open/close at station stops on AI trains having passenger trainsets with door animation. Doors are opened 4 seconds after train stop and closed 10 seconds before train start. Due to the fact that not all routes have been built with correct indication of the platform side with respect to the track, this option can be individually disabled or enabled on a per-route basis, as explained here. With option enabled, doors open and close automatically also when a player train is in autopilot mode. The option is active only in activity mode.
6.5. Keyboard Options
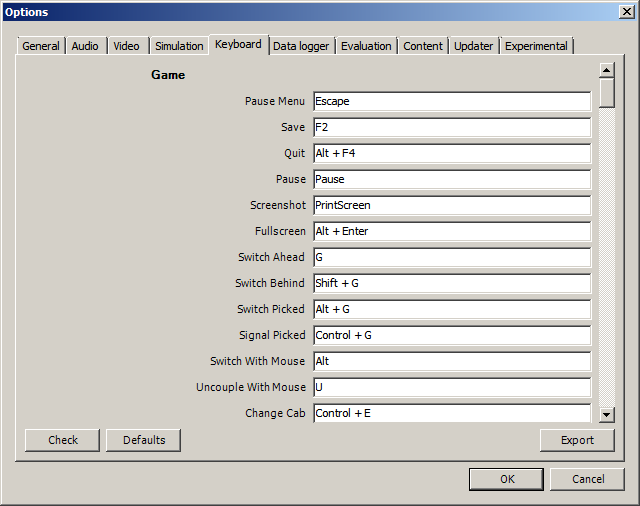
In this panel you will find listed the keyboard keys that are associated with all OR commands.
You can modify them by clicking on a field and pressing the new desired key. Three symbols will appear at the right of the field: with the first one you validate the change, with the second one you cancel it, with the third one you return to the default value.
By clicking on Check OR verifies that the changes made are compatible, that is, that there is no key that is used for more than one command.
By clicking on Defaults all changes that were made are reset, and the default values are reloaded.
By clicking on Export a printable text file Open Rails
Keyboard.txt is generated on the desktop, showing all links between
commands and keys.
6.6. Data Logger Options
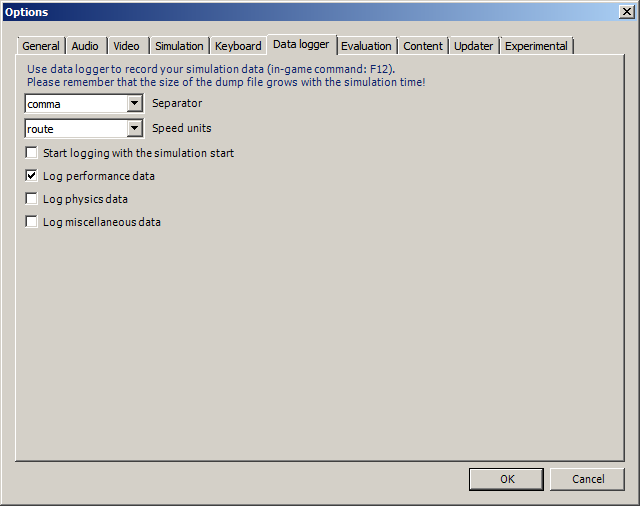
By selecting the option Start logging with the simulation start or by
pressing <F12> a file with the name dump.csv is generated in the
configured Open Rails logging folder (placed on the Desktop by default).
This file can be used for later analysis.
6.7. Evaluation Options
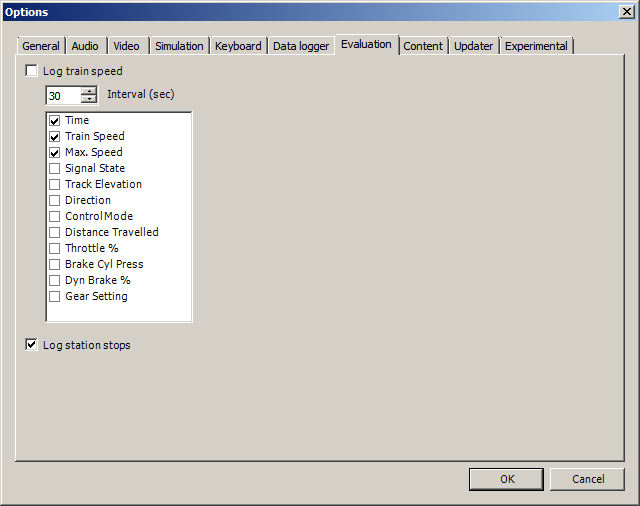
When data logging is started (see preceding paragraph), data selected in this panel are logged, allowing a later evaluation on how the activity was executed by the player.
6.8. Content Options
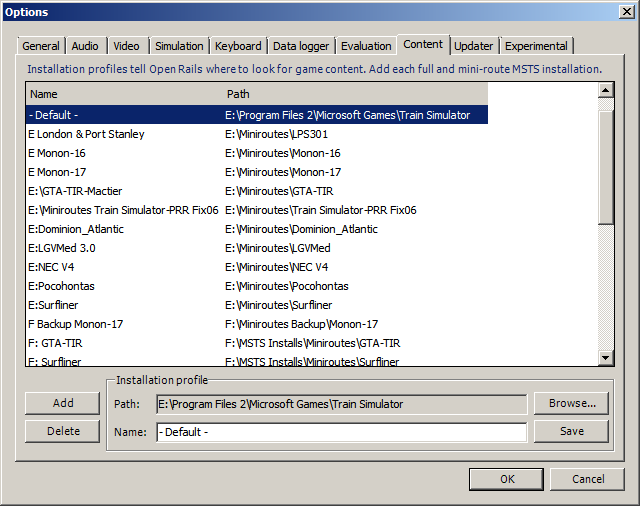
This window allows you to add, remove or modify access to additional MSTS installations or miniroute installations for Open Rails. Installations located on other drives, or on a USB key, can be added even if they are not always available.
Click on the Add button, and locate the desired installation. OR will automatically enter a proposed name in the Name: window that will appear in the Installation set: window on the main menu form. Modify the name if desired, then Click OK to add the new path and name to Open Rails.
To remove an entry (note that this does not remove the installation itself!) select the entry in the window, and click Delete, then OK to close the window. To modify an entry, use the Browse… button to access the location; make the necessary changes, and then Save the changes.
6.9. Updater Options
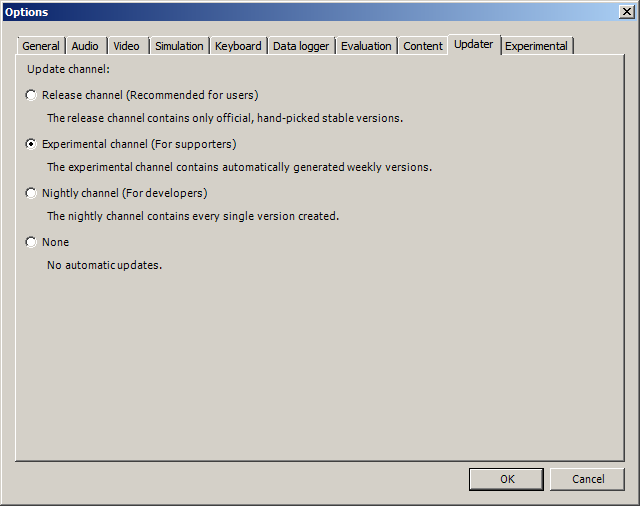
These options control which OR version update channel is active (see also here). The various options available are self-explanatory.
6.10. Experimental Options
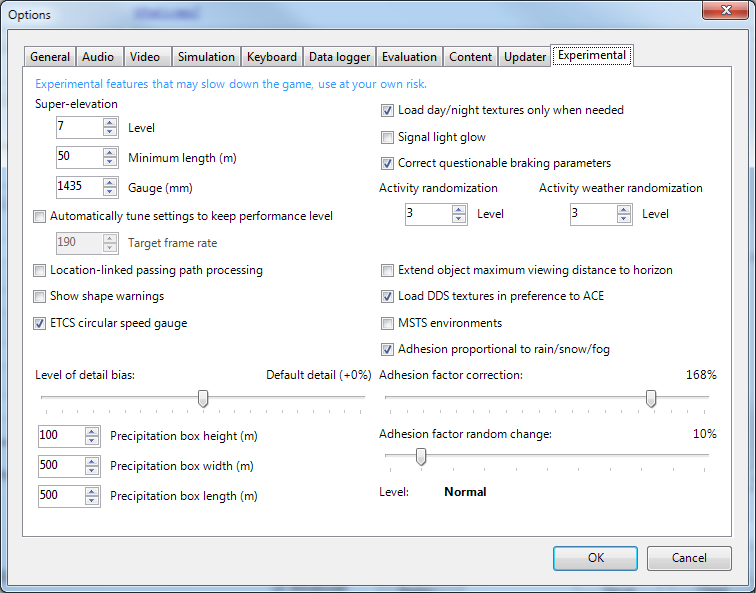
Some experimental features being introduced in Open Rails may be turned on and off through the Experimental tab of the Options window, as described below.
6.10.1. Super-elevation
If the value set for Level is greater than zero, OR supports super elevation for long curved tracks. The value Minimum Length determines the length of the shortest curve to have super-elevation. You need to choose the correct gauge for your route, otherwise some tracks may not be properly shown.
When superelevation is selected, two viewing effects occur at runtime:
- If an external camera view is selected, the tracks and the running train will be shown inclined towards the internal part of the curve.
- When the cab view is selected, the external world will be shown as inclined towards the external part of the curve.
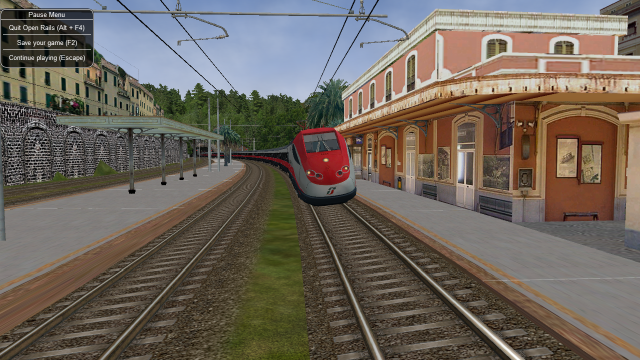
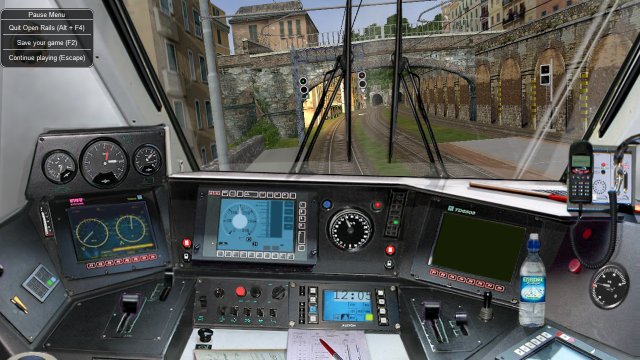
OR implements super elevated tracks using Dynamic Tracks. You can change
the appearance of tracks by creating a <route folder>/TrackProfiles/
TrProfile.stf file. The document How to Provide Track Profiles for
Open Rails Dynamic Track.docm describing the creation of track profiles
can be found in the OpenRails /Source/Documentation/ folder. Forum
discussions about track profiles can also be found on Elvas Tower.
6.10.2. Automatically tune settings to keep performance level
When this option is selected OR attempts to maintain the selected Target frame rate FPS ( Frames per second). To do this it decreases or increases the viewing distance of the standard terrain. If the option is selected, also select the desired FPS in the Target frame rate window.
6.10.3. Location-linked passing path processing
When this option is NOT selected, ORTS acts similarly to MSTS. That is, if two trains meet whose paths share some track section in a station, but are both provided with passing paths as defined with the MSTS Activity Editor, one of them will run through the passing path, therefore allowing the meet. Passing paths in this case are only available to the trains whose path has passing paths.
When this option is selected, ORTS makes available to all trains the main and the passing path of the player train. Moreover, it takes into account the train length in selecting which path to assign to a train in case of a meet.
For content developers
A more detailed description of this feature can be found under Location-Linked Passing Path Processing in the chapter Open Rails Train Operation.
6.10.4. Show shape warnings
When this option is selected, when OR is loading the shape (.s) files it
will report errors in syntax and structure (even if these don’t cause
runtime errors) in the Log file OpenRailsLog.txt on the desktop.
6.10.5. ETCS circular speed gauge
When this option is selected, it is possible to add to the cabview a circular speed gauge accordingly to the European standard train control system ETCS.
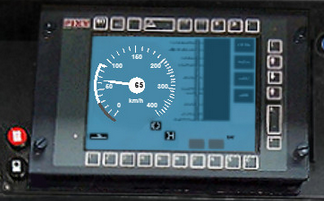
For content developers
The gauge is added by the insertion of a block like the following into the .cvf file:
Digital (
    Type ( SPEEDOMETER DIGITAL )
    Style ( NEEDLE )
    Position ( 160 255 56 56 )
    ScaleRange ( 0 250 )
    Units ( KM_PER_HOUR )
)
6.10.6. Load day/night textures only when needed
As a default OR loads night textures together with the day textures both at daytime and nighttime. When this option is selected, to reduce loading time and reduce memory used, night textures are not loaded in the daytime and are only loaded at sunset (if the game continues through sunset time); analogously day textures are not loaded in the nighttime if the related night textures are available, and are only loaded at sunrise (if the game continues through sunrise time).
6.10.7. Signal light glow
When this option is set, a glowing effect is added to signal semaphores when seen at distance, so that they are visible at a greater distance. There are routes where this effect has already been natively introduced; for these, this option is not recommended.
6.10.8. Correct questionable braking parameters
When this option is selected, Open Rails corrects some braking parameters if they are out of a reasonable range or if they are incoherent. This is due to the fact that many existing .eng files have such issues, that are not a problem for MSTS, which has a much simpler braking model, but that are a problem for OR, which has a more sophisticated braking model. The problem usually is that the train brakes require a long time to release, and in some times do not release at all.
The following checks and corrections are performed if the option is checked (only for single-pipe brake system):
- if the compressor restart pressure is smaller or very near to the max system pressure, the compressor restart pressure and if necessary the max main reservoir pressure are increased;
- if the main reservoir volume is smaller than 0.3 m3 and the engine mass is higher than 20 tons, the reservoir volume is raised to 0.78 m3;
- the charging rate of the reservoir is derived from the .eng parameter
AirBrakesAirCompressorPowerRating(if this generates a value greater than 0.5 psi/s) instead of using a default value.
6.10.9. Activity randomization
The related Level box may be set to integer values from zero to three.
When a level of zero is selected, no randomization is inserted.
When a level greater than zero is selected, some activity parameters are randomly
changed, therefore causing different behaviors of the activity at every run.
Level 1 generates a moderate randomization, level 2 a significant randomization
and level 3 a high randomization, that may be unrealistic in some cases.
This feature is described in greater detail here.
6.10.10. Activity weather randomization
The Level box works as the one for activity randomization, and has the
same range. When a level greater than zero is selected, the initial weather is
randomized, and moreover it changes during activity execution.
The randomization is not performed if at activity start the train is within a
lat/lon rectangle corresponding to the arid zone of North America (lat from
105 to 120 degrees west and lon from 30 to 45 degrees north).
The randomization is not performed either if the activity contains weather
change events.
6.10.11. Extend object maximum viewing distance to horizon
With this option selected, all objects viewable up to the viewing distance defined in the Video Options are displayed. As a default ORTS only displays objects up to 2000 m distance. Selecting this option improves display quality but may reduce frame rate.
6.10.12. Load DDS textures in preference to ACE
Open Rails is capable of loading both ACE and DDS textures. If only one of the two is present, it is loaded. If both are present, the ACE texture is loaded unless this option has been selected.
6.10.13. MSTS Environments
By default ORTS uses its own environment files and algorithms, e.g. for night sky and for clouds.
With this option selected, ORTS applies the MSTS environment files. This includes support of Kosmos environments, even if the final effect may be different from the current MSTS one.
6.10.14. Adhesion factor correction
The adhesion is multiplied by this percentage factor. Therefore lower values of the slider reduce adhesion and cause more frequent wheel slips and therefore a more difficult, but more challenging driving experience.
6.10.15. Level of detail bias
This option is an expansion (and replacement) of an earlier experimental option: Always use highest level of detail. The new option allows you to increase or reduce the level of detail generally shown independently of the viewing distance and world object density.
6.10.16. Adhesion proportional to rain/snow/fog
When this option is selected, adhesion becomes dependent on the intensity of rain and snow and the density of fog. Intensities and density can be modified at runtime by the player.
6.10.17. Adhesion factor random change
This factor randomizes the adhesion factor corrector by the entered percentage. The higher the value, the higher the adhesion variations.
6.10.18. Precipitation Box Size
Open Rails will simulate precipitation – i.e. rain or snow, as falling individual particles. This represents a significant computing and display system load, especially for systems with limited resources. Therefore, the region in which the precipitation particles are visible, the Precipitation Box, is limited in size and moves with the camera. The size of the box can be set by the entries in the height, width and length boxes. The X and Z values are centered on the camera location, and falling particles spawn and fall from the top of the box.
The max size for both length and width is 3000 meters or 9,842ft. Due to possibe resource issues, the ability to use max length and width may not be possible. The best way to use the precipitation box is to define a square around your entire train if small enough or around most of your train. Keep track on how your resources are being used since snow will take up the most resources so you will have to adjust the size until you are satisified with the results.
The reason for defining a square around your train is to minimize the moments when your train is approaching the edge of the precipitation box. Worst case is to save the activity, exit and re-enter the activity since doing this will set your train back in the middle of the precipitation box.